Install an SSL Certificate on Exchange 2013-2016
The SSL certificate installation procedures for Exchange 2013 and Exchange 2016 are largely identical. The process mainly consists of two major steps: importing the SSL certificate and binding the SSL certificate. You can refer to the steps below to install an SSL certificate on Exchange 2013/2016.
1. Import the SSL certificate
- First, you need to import the SSL certificate. Press and hold
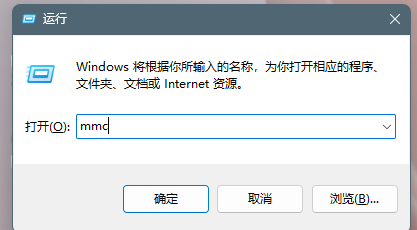
win + ron your keyboard to open the Run dialog box. Entermmcin the Run dialog box, then click "OK" to open the console.

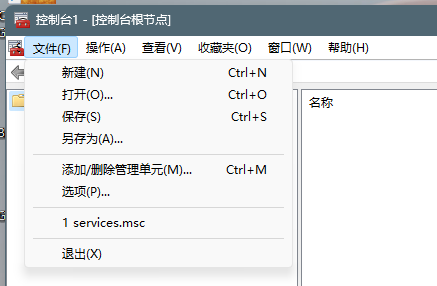
- On the console interface, click "File" and then "Add/Remove Snap-in" in sequence.

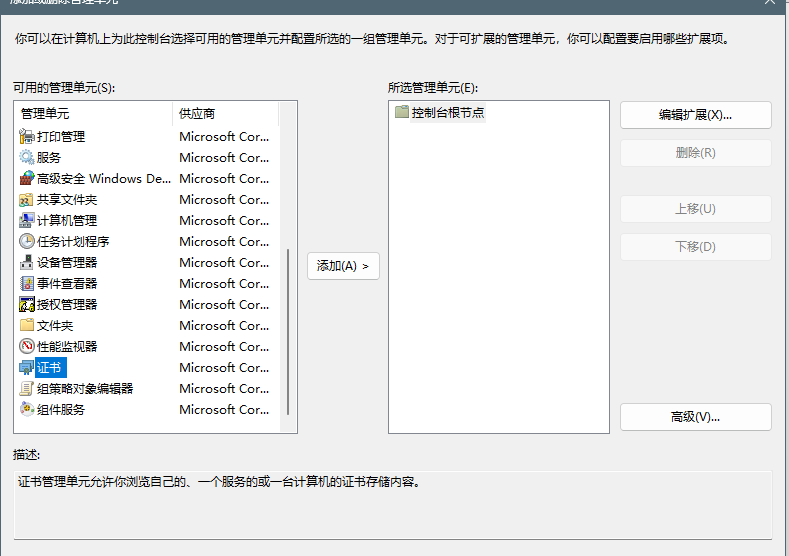
- Next, select "Certificates" and click "Add" to open the Certificates snap-in.

- In the Certificates snap-in, select "Computer account", then click "Next".
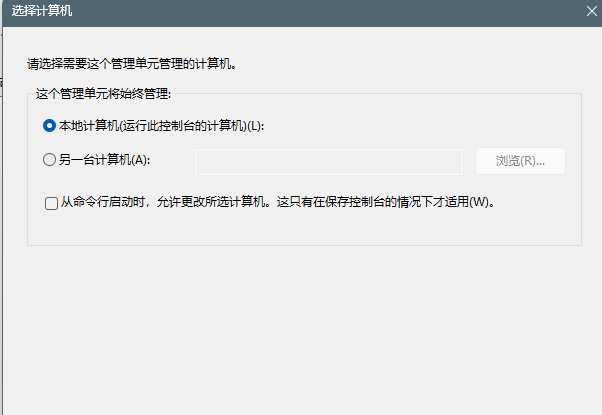
- Keep the default local computer selection, then proceed to the next step.

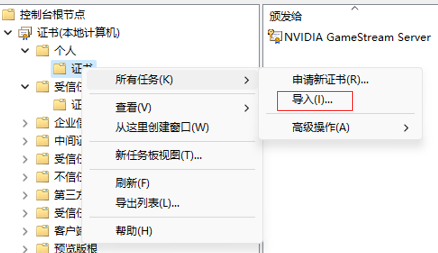
- Right-click "Certificates" under "Personal", select "All Tasks" > "Import" to open the Certificate Import Wizard.

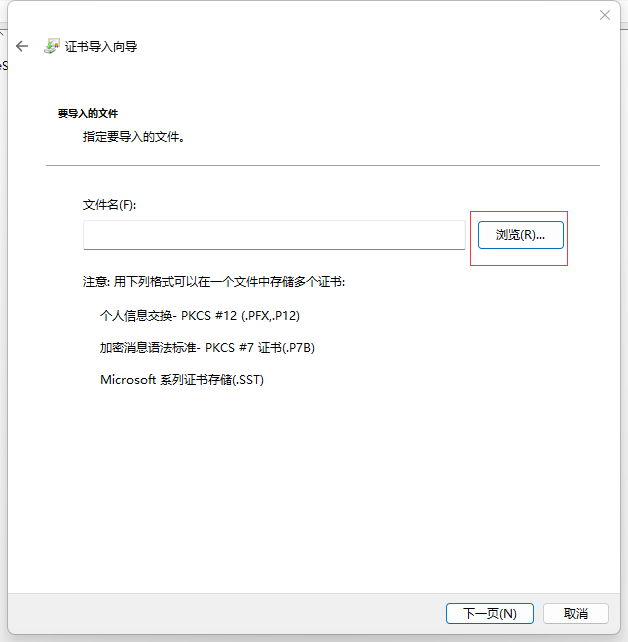
- On the Certificate Import Wizard screen, select "Browse".

- Next, select the PFX format certificate in the IIS folder from the compressed package we provided, for example "racent_com.pfx"
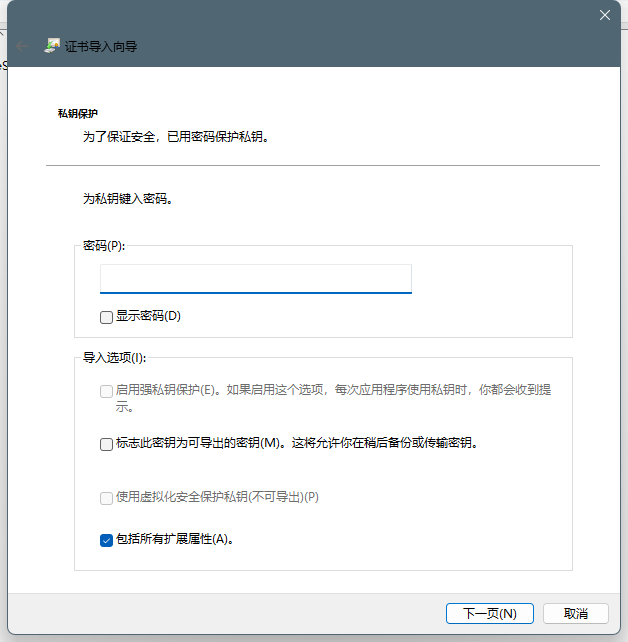
- Enter the password contained in the password file in the IIS folder, then click "Next"

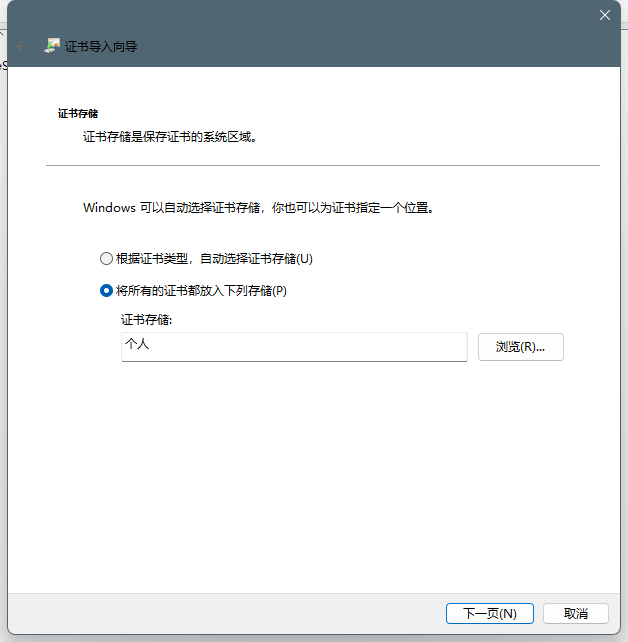
- Select "Place all certificates in the following store", set the certificate store to "Personal", then click "Next"

- This completes the SSL certificate import. After a successful import, three complete certificates will be displayed

II. Bind the SSL Certificate
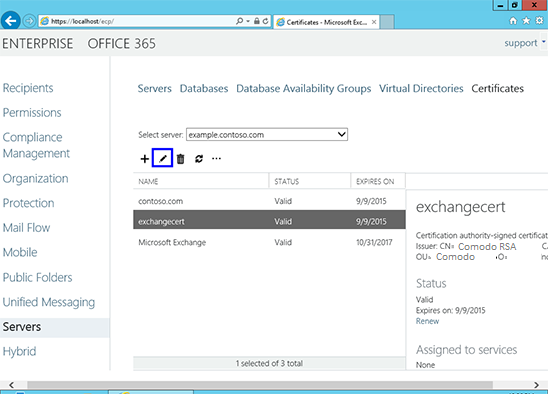
- Next, to bind and apply your SSL certificate, return to the Exchange Admin Center. Go to "servers" - "certificates", select the correct server, find the imported certificate, select it, and click "Edit"

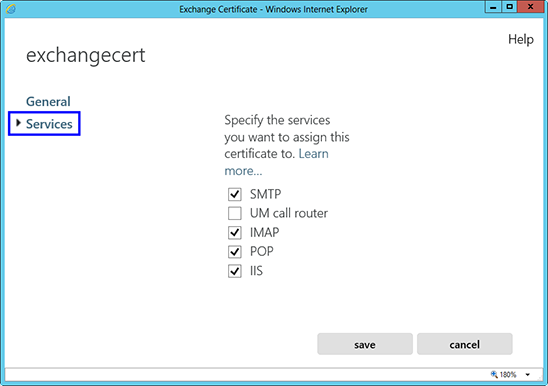
- Then click the "Services" button on the left, select the services that will use the certificate, and click the "Save" button

Once the above steps are completed, your certificate has been successfully installed and enabled.