Install an SSL Certificate on a Weblogic Server
This guide describes how to install the downloaded SSL certificate on a Weblogic server. After the certificate is installed, your web server will support SSL communication, thus securing the web server's communications.
The commented parts in the code are customizable and can be modified according to your actual configuration.
I. Prerequisites
- After we issue the certificate for you, you will receive the certificate file (
.zip) in compressed format, which contains four certificate formats, such as:Tomcat、Nginx、IIS、Apache;Weblogic. The application server requires thejkscertificate file insideTomcat:
- Obtain the server certificate file
Use the .crt file from the Nginx folder, copy the server certificate content in the first section of this public key file from BEGIN to END (including —–BEGIN CERTIFICATE—– and —–END CERTIFICATE—–) and paste it into a text editor such as Notepad, then change the file extension and save it as the server.crt file.
- Obtain the CA certificate file
Using the .crt file in the Nginx folder, copy the contents of the two CA certificates in the second and third sections of this public key file, spanning from BEGIN through the end of END (including —–BEGIN CERTIFICATE—- and —–END CERTIFICATE—–), paste them respectively into a text editor such as Notepad, change the file extension, and save them as the ca1.crt and ca2.crt files.
- Check the content of the
keystorefile, navigate to thebindirectory under theJDKinstallation directory, and run thekeytoolcommand to query the information of thekeystorefile.
# keystore.jks password 为可自定义部分,可根据实际配置情况相应修改。
keytool -list -keystore keystore.jks -storepass password
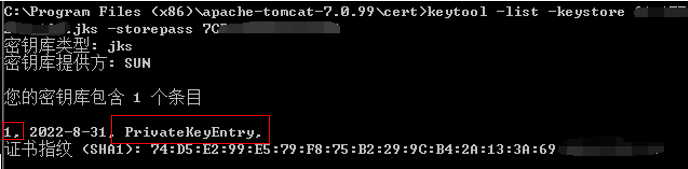
Note: The private key alias (alias) for the PrivateKeyEntry (or KeyEntry) attribute is found to be "1". Please remember this alias, as it will be required when importing the server certificate later.
2. Import the Certificate
- Import the first CA certificate
# ca1 keystore.jks password ca1.crt 为可自定义部分,可根据实际配置情况相应修改。
keytool -import -alias ca1 -keystore keystore.jks -trustcacerts –storepass password -file ca1.crt -noprompt
- Import the second CA certificate
# ca2 keystore.jks password ca2.crt 为可自定义部分,可根据实际配置情况相应修改。
keytool -import -alias ca2 -keystore keystore.jks -trustcacerts –storepass password -file ca2.crt –noprompt
- Import the server certificate
# 1 keystore.jks password server.crt 为可自定义部分,可根据实际配置情况相应修改。
keytool -import -alias 1 -keystore keystore.jks -trustcacerts –storepass password -file server.crt
- After the certificate is imported, run the
keystoolcommand and check the content of thekeystorefile again
# keystore.jks password 为可自定义部分,可根据实际配置情况相应修改。
keytool -list -keystore keystore.jks -storepass password
3. Configure and deploy the SSL certificate
- Access the server. After successfully logging in to
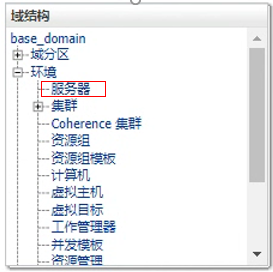
Weblogic, you will arrive at this page. Click "Servers" under "Domain Structure".

- Access the
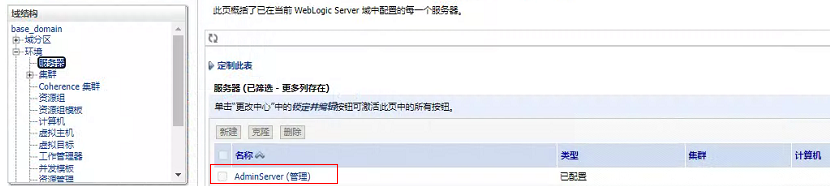
Webmanagement device and select the name of theWebserver (AdminiServer) you want to configure.

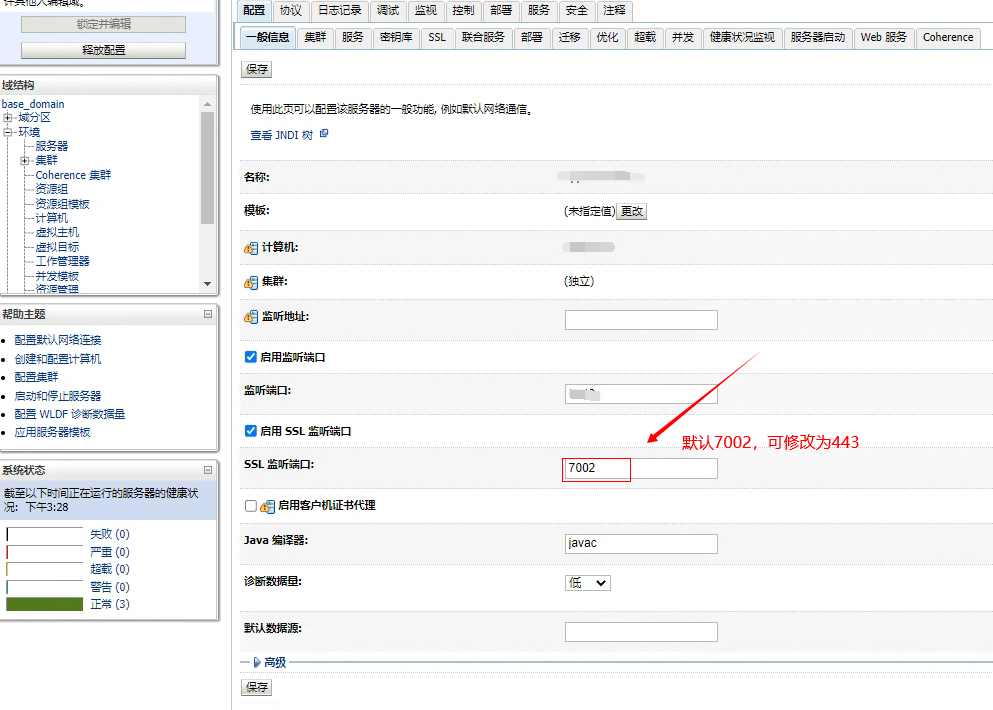
After entering the management settings of AdminiServer, the interface is as follows:
- First, click Lock & Edit, and the column on the right will become editable;
- Check the option to enable the
SSLlistening port to activate it, then change the default7002to443; - After completing the modifications, click "Save" to finish the basic port configuration;
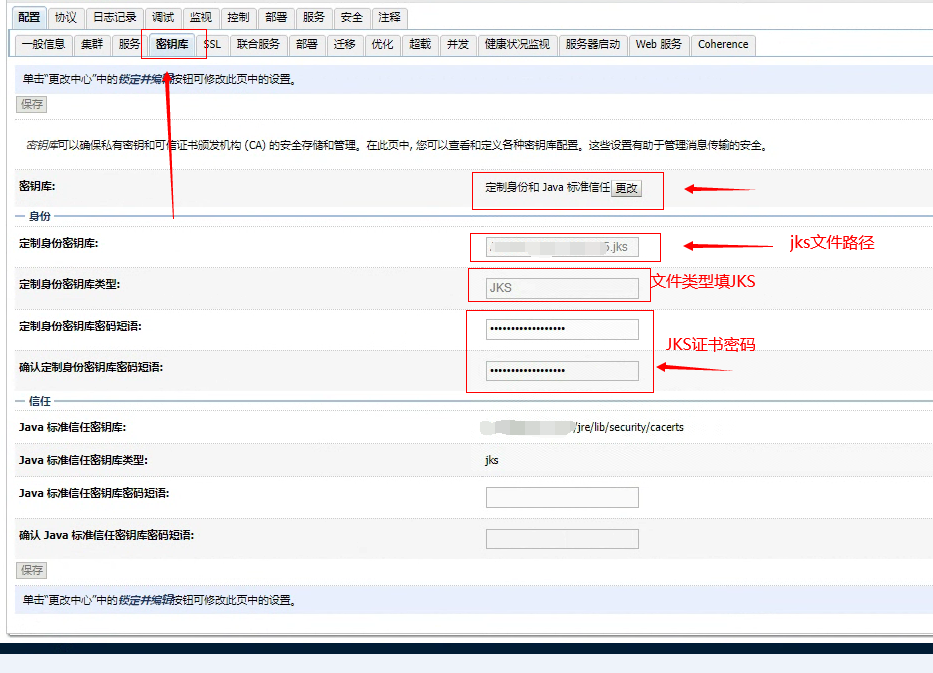
- Then click "Keystore" to configure the certificate files;

- Enter the "Keystore" section
- Keystore: You must select "Custom Identity and Java Standard Trust";
- Specify the file path of your
JKScertificate (for example:keystore.jks); and set the identity keystore type to:JKS; - Enter your
JKSpassword and re-enter it to confirm; - No changes are required in the trust section;
- After completing the modifications, click "Save";

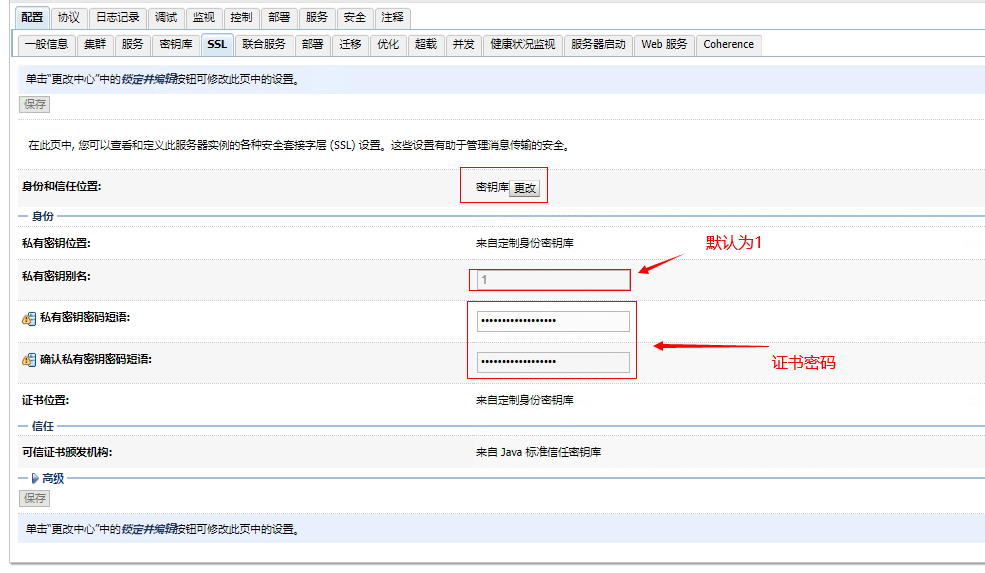
- Go to "SSL"
- Identity and Trust Locations: Select Keystores;
- Private Key Alias: This refers to the alias of
JKS. The default alias in theJKScertificate file issued by Racent is: "1"; - Private Key Passphrase: Enter the password from the
passwordfile in theTomcatfolder, then enter it again to confirm the passphrase; - After completing the modifications, click "Save";

If your weblogic version is between 10.3.6-12C, please check JSSE in SSL - Advanced.
IV. Activate Configuration Items
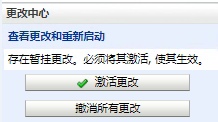
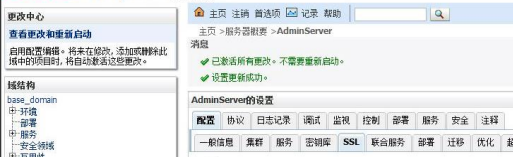
After you have modified and saved all the above items, click Activate Changes to activate the configuration automatically. No restart is required after the changes are applied.


At this point, the certificate installation and configuration are complete. Finally, you can exit the system and use a browser to test access via https.